Working with wood can be both rewarding and therapeutic. DIY wood projects allow you to create functional and decorative items while honing your skills. This guide presents ten creative wood projects, with step-by-step instructions, materials, preparation, and tips for success.

1. Wooden Coffee Table
Project Concept: A stylish wooden coffee table can enhance any living room with functionality and aesthetic appeal. This project is ideal for beginners and intermediate DIY enthusiasts.
Materials Needed: Solid wood boards, wood screws, wood glue, sandpaper, wood stain or paint, protective finish, saw, drill, measuring tape, clamps.
Preparation: Measure the desired size of your coffee table. Choose sturdy wood like pine or oak. Cut the boards according to the dimensions for tabletop, legs, and supports. Sand all pieces to remove rough edges and splinters.
Construction: Assemble the tabletop first, securing boards with wood glue and clamps. Attach the legs using screws and additional wood glue for strength. Sand the entire structure to smooth imperfections. Apply wood stain or paint to achieve the desired color and finish. Finish with a protective coat for durability.
Tips: Always wear protective gear while cutting or drilling. Ensure all legs are level for stability. Clamps help hold pieces together during drying for stronger joints.

2. Floating Wooden Shelves
Project Concept: Floating shelves are functional, modern, and easy to install. They provide storage or display space while saving floor area.
Materials Needed: Wooden planks, wall brackets or concealed mounting hardware, drill, screws, wood stain or paint, sandpaper, level, measuring tape.
Preparation: Choose sturdy wood suitable for holding weight. Measure the space and mark the wall where the shelves will be installed. Cut wood to the desired shelf length. Sand all surfaces to remove rough edges.
Construction: Apply stain or paint and allow drying. Attach brackets or concealed mounts to the wall, ensuring they are level. Secure the wooden planks onto the brackets. Check stability and weight tolerance before placing items on the shelf.
Tips: Use a level to ensure shelves are perfectly horizontal. Consider using heavier wood for large shelves to prevent sagging. Concealed mounts give a clean, modern look without visible brackets.

3. Wooden Plant Stand
Project Concept: A wooden plant stand can elevate indoor or outdoor plants while adding a rustic charm to your space. It can be designed in multiple tiers for variety.
Materials Needed: Wooden planks or pallets, screws, wood glue, sandpaper, wood stain, drill, saw, measuring tape, protective finish.
Preparation: Measure the space where the stand will be placed and determine the height and number of tiers. Select wood suitable for indoor or outdoor use. Cut pieces for shelves and supporting legs. Sand all edges to prevent splinters.
Construction: Assemble the base and legs first using screws and wood glue. Attach horizontal shelves at the desired height. Ensure the structure is level and stable. Apply wood stain or paint and finish with a protective coat to resist moisture and wear.
Tips: For outdoor plants, use water-resistant wood or apply a weatherproof finish. Test the stand with plants of similar weight to ensure stability.

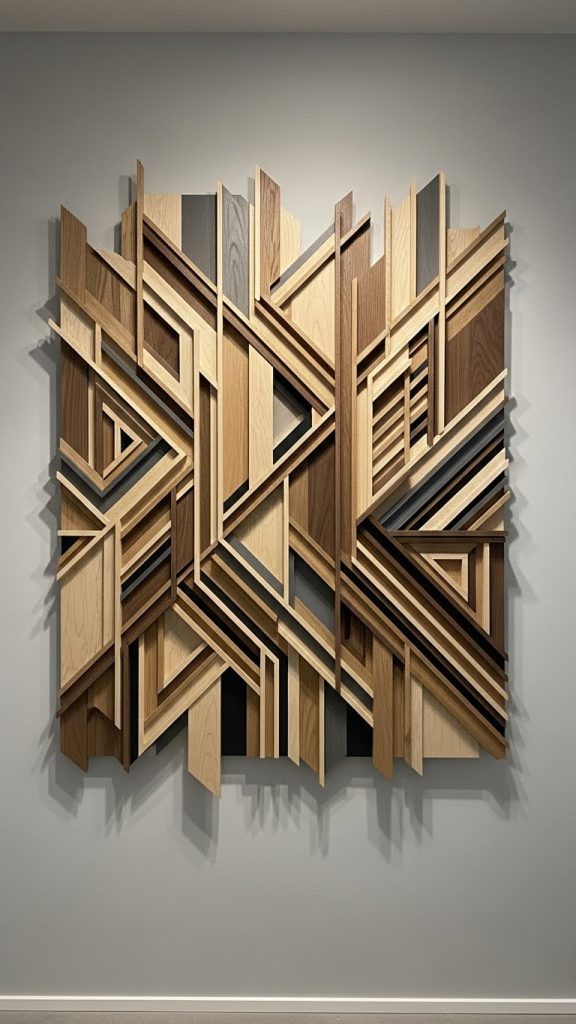
4. Wooden Wall Art
Project Concept: Wooden wall art is a creative way to decorate a space using natural textures. Geometric shapes, abstract patterns, or reclaimed wood can be used.
Materials Needed: Thin wooden boards or plywood, saw, sandpaper, wood glue, nails, hammer, wood stain or paint, measuring tape, level.
Preparation: Choose the design and sketch it on paper. Select wood pieces of similar thickness. Cut the wood according to the design. Sand edges and surfaces to achieve smooth finishes.
Construction: Arrange the pieces on a flat surface to visualize the design. Attach pieces using wood glue and nails for extra strength. Apply stain or paint as desired. Allow the piece to dry before hanging on the wall using strong hooks or brackets.
Tips: Reclaimed wood adds character and texture. Use a level while hanging to ensure the design looks straight. Experiment with patterns like chevrons or abstract shapes.
5. Wooden Jewelry Box
Project Concept: A small wooden jewelry box is both decorative and practical, perfect for storing accessories or personal items.
Materials Needed: Plywood or softwood, hinges, screws, wood glue, saw, sandpaper, wood stain or paint, protective finish, drill, measuring tape.
Preparation: Measure the desired dimensions for the box. Cut pieces for the base, sides, lid, and any internal compartments. Sand all surfaces and edges carefully.
Construction: Assemble the sides and base using wood glue and screws. Attach the lid using small hinges. Optionally, create compartments inside the box for organization. Apply wood stain or paint and finish with a protective coat.
Tips: Use softwood like pine for easier cutting and sanding. Ensure hinges align perfectly to allow smooth lid operation. Decorative carvings or patterns can add a personal touch.

6. Wooden Coat Rack
Project Concept: A wooden coat rack combines functionality with rustic charm. It can be mounted on the wall or stand as a freestanding piece.
Materials Needed: Wooden plank or beam, hooks, screws, wood glue, saw, drill, sandpaper, wood stain or paint, measuring tape, level.
Preparation: Choose a suitable piece of wood for durability. Cut the plank to the desired length. Sand the surface and edges to prevent splinters. Mark positions for hooks evenly across the plank.
Construction: Drill pilot holes for the hooks and attach them securely. Apply wood stain or paint for aesthetic appeal. Mount the plank on the wall using screws and anchors or construct a freestanding base.
Tips: Test the weight capacity before hanging heavy items. Align hooks carefully for symmetry. Choose weather-resistant wood for outdoor use.

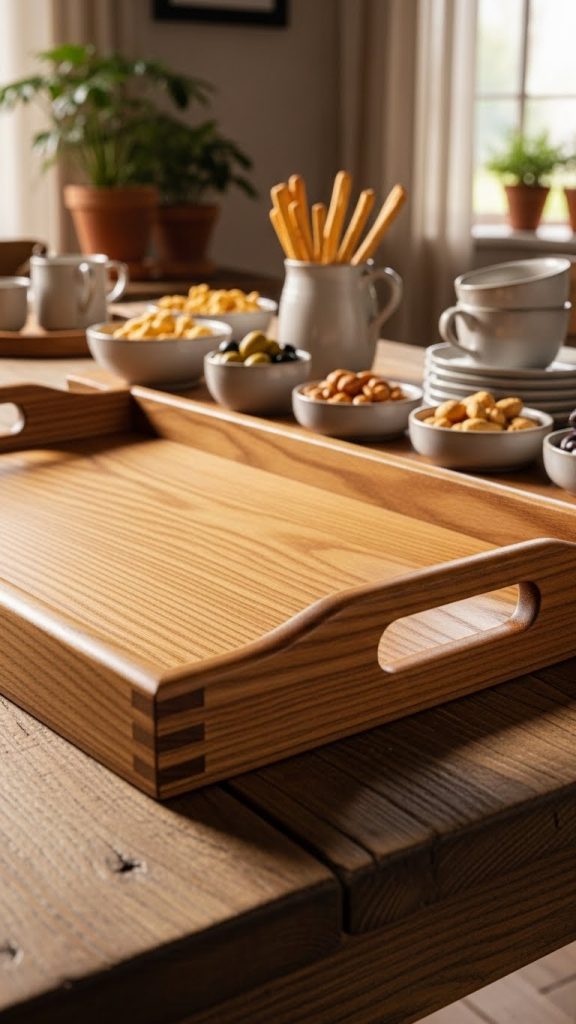
7. Wooden Serving Tray
Project Concept: A wooden serving tray is practical and decorative, ideal for hosting or home decor. Handles can be added for easy carrying.
Materials Needed: Wooden board or plywood, saw, sandpaper, wood glue, screws, handles, drill, wood stain or paint, protective finish.
Preparation: Measure the desired size and cut the base and side panels. Sand edges and surfaces to smooth rough areas. Choose handles that complement the tray style.
Construction: Attach side panels to the base using screws and wood glue. Attach handles securely to each side. Apply stain or paint and finish with a protective coat for durability and moisture resistance.
Tips: Ensure handles are sturdy enough for heavy loads. Rounded edges enhance safety and comfort. Personalizing with paint or carving adds a unique touch.
8. Wooden Bookshelf
Project Concept: A DIY wooden bookshelf is functional, customizable, and adds a warm, natural element to any room.
Materials Needed: Wooden planks, screws, wood glue, saw, drill, sandpaper, wood stain or paint, measuring tape, level, protective finish.
Preparation: Determine the dimensions and number of shelves. Cut wood to size and sand edges. Ensure planks are sturdy enough to support books.
Construction: Assemble the frame first, securing vertical and horizontal supports with screws and glue. Add shelves at desired heights. Sand the entire structure and apply wood stain or paint. Finish with a protective coat to prevent damage.
Tips: Check alignment with a level for a professional finish. Reinforce shelves for heavy books. Adjustable shelves can add flexibility for varying storage needs.

9. Wooden Picture Frame
Project Concept: A custom wooden picture frame allows you to display artwork or photos in a personalized way.
Materials Needed: Wooden strips, saw, sandpaper, wood glue, clamps, miter box, wood stain or paint, protective finish, glass, backing board.
Preparation: Measure the photo or artwork size. Cut wood strips at precise angles using a miter box for perfect corners. Sand all edges to smooth rough areas.
Construction: Assemble the frame by gluing and clamping corners together. Once dried, apply stain or paint and protective finish. Insert glass, backing board, and artwork or photo.
Tips: Use clamps to ensure tight corners. Choose wood and stain to match home decor. Custom carvings or decorative touches enhance uniqueness.

10. Wooden Serving Cart
Project Concept: A wooden serving cart is both practical and stylish, perfect for entertaining or kitchen use.
Materials Needed: Wooden planks, screws, wood glue, saw, drill, sandpaper, wheels, handles, wood stain or paint, protective finish, measuring tape.
Preparation: Decide on the cart size and shelf arrangement. Cut planks for shelves, sides, and top. Sand all pieces to remove splinters. Choose durable wood for stability.
Construction: Assemble the frame with wood glue and screws. Attach shelves and secure wheels at the base. Add handles for mobility. Apply stain or paint and finish with a protective coat for durability.
Tips: Ensure wheels can rotate smoothly and support weight. Test cart stability before placing heavy items. Rounded edges prevent injury during use.