
Robots have always fascinated people of all ages. Their futuristic designs and endless possibilities make them a perfect subject for crafts. Whether you are a parent looking to engage your child in a fun and educational activity, a teacher searching for classroom projects, or simply a hobbyist who enjoys hands-on work, making robot crafts is a creative and rewarding experience. Not only do these projects allow you to explore imagination and artistic skills, but they also introduce basic concepts of engineering, design, and problem-solving. Robot crafts can range from simple paper creations to more advanced builds using recycled materials or electronics.

In this guide, we will explore ten exciting robot craft ideas. Each idea includes preparation instructions, the materials you will need, and a step-by-step approach. These crafts are suitable for beginners and can be adjusted to match your skill level. By following these projects, you can create unique robots that are perfect for home decoration, gifts, educational purposes, or just fun play. Let’s dive into the world of imaginative robot crafting.
1. Recycled Box Robot
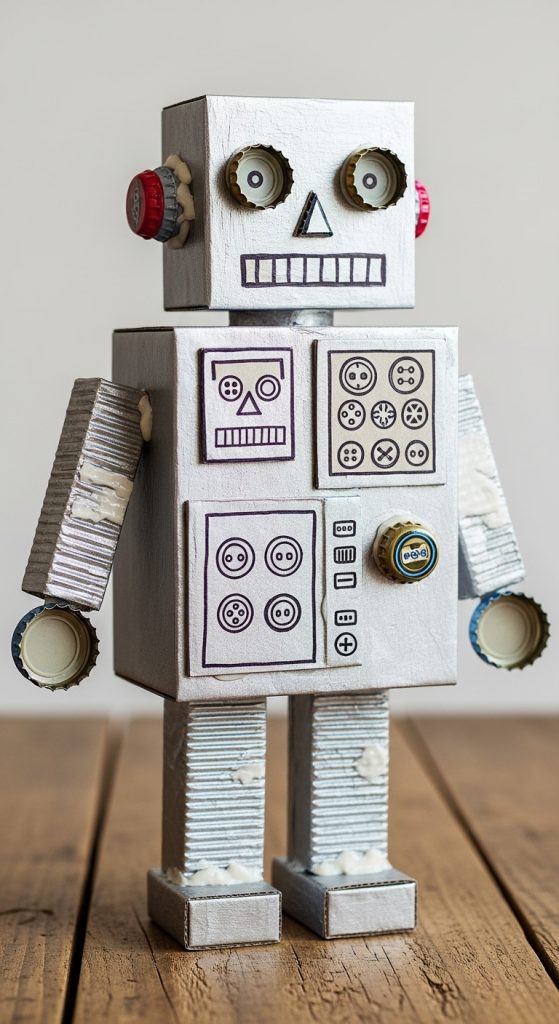
Creating a robot from recycled boxes is simple, eco-friendly, and fun. You will need cardboard boxes of various sizes, glue, scissors, paint, and markers. Begin by selecting a medium-sized box for the robot’s body and a smaller box for the head. Cut openings for arms and legs if desired, and attach smaller boxes or bottle caps for feet and hands. Paint the body with metallic colors like silver or gray to give a robotic appearance. Use markers or stickers to add facial features such as eyes and a mouth. You can also attach buttons, caps, or paper clips to represent control panels. This project encourages creativity and recycling awareness while allowing children to experiment with different shapes and designs. The result is a charming, homemade robot that can be displayed or used as a toy.
2. Bottle Cap Robot
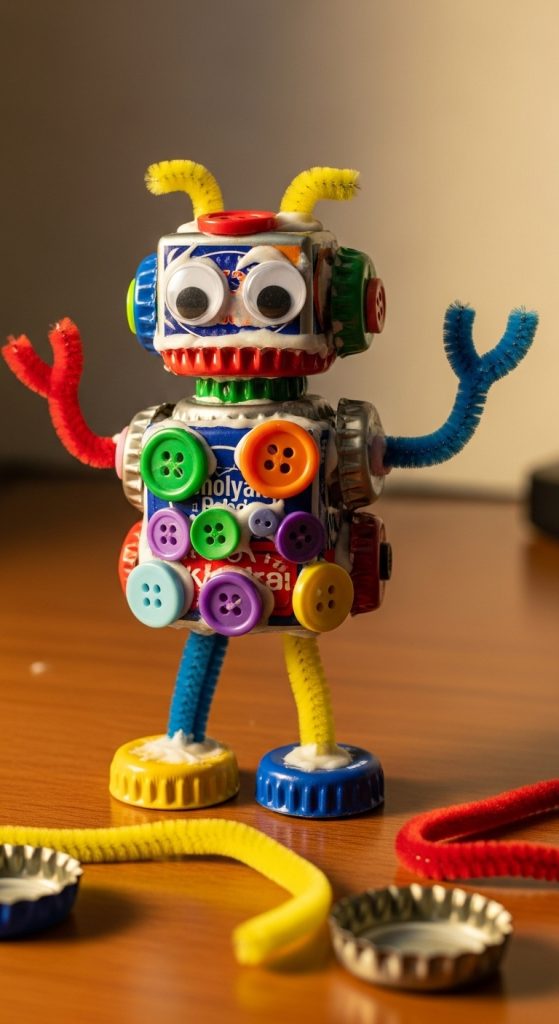
A bottle cap robot is a compact and creative craft that uses everyday waste items. Gather bottle caps of various sizes, glue, paint, googly eyes, pipe cleaners, and cardboard. Start by gluing bottle caps together to form the robot’s body and head. Pipe cleaners can be shaped into arms, legs, or antennae. Paint the caps with bright metallic or neon colors to make the robot visually appealing. Use googly eyes for a fun and animated expression. This craft is ideal for teaching children about upcycling and helps develop fine motor skills through precise gluing and assembly. The small size of these robots makes them perfect for desk decoration, gifts, or even keychains.
3. Tin Can Robot
Tin cans provide a sturdy base for a durable robot craft. Collect empty cans of different sizes, spray paint, glue, screws, and decorative materials like buttons or beads. Wash and dry the cans before starting. Use a large can for the body and smaller ones for the head, arms, and legs. Spray paint the cans silver or metallic colors to give a realistic robot effect. Glue buttons, beads, or bottle caps on the body to simulate control panels and other mechanical details. You can attach arms and legs using screws or strong glue, ensuring the robot stands securely. Tin can robots are not only visually impressive but also reinforce the idea of creative reuse and industrial design.

4. Paper Plate Robot
Paper plates are inexpensive and versatile materials for crafting robots. You will need paper plates, colored paper, glue, scissors, markers, and pipe cleaners. Start by using a large paper plate for the robot’s body and a smaller plate for the head. Cut out arms and legs from colored paper or use folded plates for three-dimensional effects. Draw buttons, dials, and screens on the plates using markers. Pipe cleaners can serve as antennas or flexible limbs. Paper plate robots are perfect for classroom projects or activities with younger children because the materials are safe, lightweight, and easy to handle. The flat and circular design also allows for creative decoration without complex assembly.

5. LEGO Robot
LEGO bricks provide a fun and interactive way to build robot models. Choose LEGO sets or loose bricks in various sizes and colors. Begin by creating a sturdy base for the robot’s body, then stack bricks to build the head, arms, and legs. You can use hinge bricks or joints to create movable arms or legs. LEGO robots allow for both creativity and problem-solving as you design functional shapes or characters. You can also add small wheels, gears, or sensors if you want to introduce basic robotics concepts. This craft is ideal for children and adults who enjoy modular building and want a hands-on learning experience. The advantage of LEGO robots is that they are reusable and adaptable for endless designs.

6. Sock Robot
Sock robots are soft, safe, and perfect for younger children. You will need old socks, rice or cotton for stuffing, buttons, felt, and thread. Start by filling the sock with rice or cotton to create a body shape. Sew or glue a second sock to form the robot’s head. Attach buttons for eyes and felt shapes for mouth, ears, or control panels. You can also create arms and legs from smaller socks or felt strips. Sock robots are cuddly, customizable, and make excellent gifts or toys. This project encourages sewing skills, creativity, and imaginative play. You can experiment with patterns, colors, and textures to design unique robot characters.

7. Circuit Robot Craft
For a more advanced project, create a circuit robot using basic electronics. Materials include small LED lights, batteries, copper tape, cardboard, glue, and markers. Design a simple robot body from cardboard. Plan where the LEDs will go, such as eyes or control panels. Connect the LEDs to a battery using copper tape to complete a basic circuit. You can decorate the robot with markers or paint without disturbing the wiring. This craft introduces children to basic electronics, problem-solving, and engineering concepts. The glowing LEDs make the robot visually appealing and interactive, turning a craft project into a fun STEM learning experience.

8. Clay Robot
Clay robots are highly customizable and allow for detailed sculpting. Use air-dry clay, acrylic paints, small beads, and craft tools. Start by shaping the robot’s body, head, and limbs from clay. Add small details such as buttons, dials, and antennas. Once dry, paint the robot in metallic or bright colors. You can also attach beads or small craft items for extra decoration. Clay robots are ideal for artistic expression and developing fine motor skills. They can be displayed as decorative pieces or used in stop-motion animation projects. This craft allows complete freedom in design, from cute cartoonish robots to realistic mechanical models.

9. Wooden Robot Craft
Wooden robots offer durability and a natural aesthetic. Materials include wooden blocks, glue, screws, paint, sandpaper, and small hinges. Start by sanding wooden blocks to smooth rough edges. Assemble the body, head, arms, and legs using glue or screws. Hinges allow movable joints for interactive play. Paint or stain the wood for a polished finish. Wooden robots are excellent for hands-on building experience and can last for years. This project introduces basic woodworking skills and encourages creativity in constructing three-dimensional figures. Wooden robots are sturdy, educational, and make fantastic gifts or decor items.

10. Recycled Electronics Robot
Turn old electronic parts into a creative robot craft. Gather circuit boards, wires, small motors, screws, glue, and cardboard. Start by assembling a robot shape using cardboard or scrap metal as the base. Glue old circuit boards, buttons, and wires onto the robot to simulate a mechanical appearance. You can add small motors for movement if desired. This craft teaches recycling and encourages curiosity about how electronics work. Recycled electronics robots are visually striking, educational, and perfect for teens or adults interested in engineering. The combination of creative design and practical reuse makes this project both innovative and environmentally conscious.
